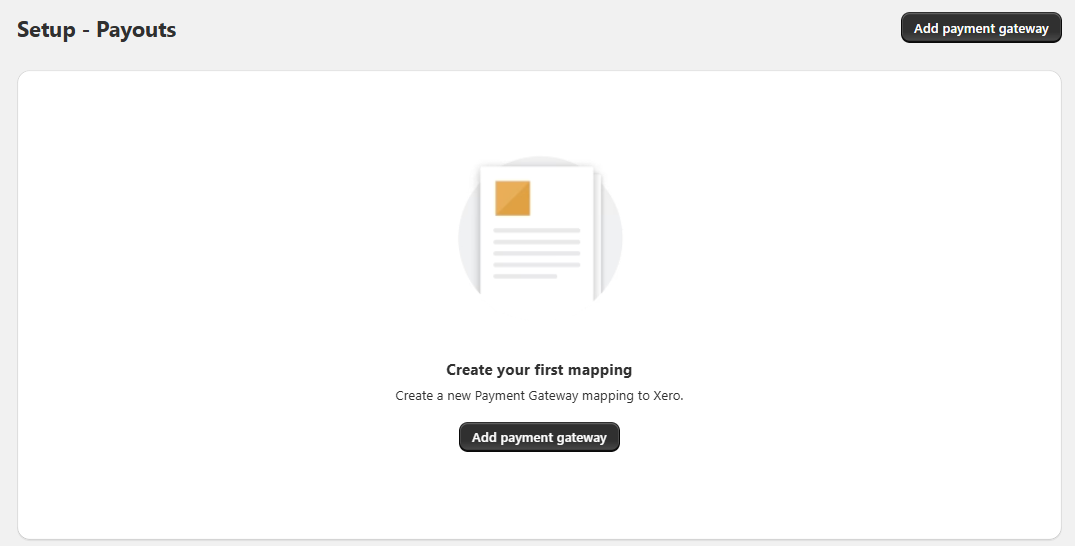
Setup Payouts
As you receive payments for orders in Shopify, you’ll need to configure how those payments are posted in Xero for each payment gateway.
However, if you do not require payments and fees for that specific payment gateway to be posted to Xero automatically (for example, if you prefer invoices to be created as Drafts so you can edit and approve them manually), you do not need to set up that gateway — you can skip this step and leave it unconfigured.
If you have already set up your payment gateways and no longer want payments and/or fees to be posted to Xero, you can either disable all of them from the Setup – Advanced page in the app or disable them individually in Step 8 of each payment gateway configuration.
To do this, click the Add payment gateway button on the Setup – Payouts screen.
Step-by-Step Walkthrough to Set Up Your Payment Gateway
- Select payment method

Select the payment method your orders will use.
If the payment method you are looking for is not in the list, you will first need to create an order using that payment method in your Shopify admin Orders screen.

Once created, post that order to Xero using the Orders Dashboard. Select the order by clicking the checkbox, then click Post to Xero.

After this is done, return to the Setup – Payouts screen. The missing payment method will now be available for configuration.
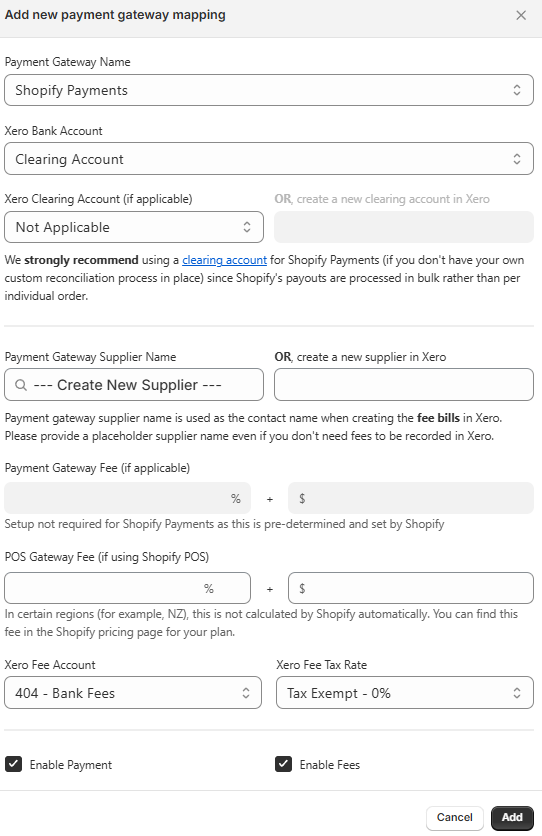
- Select Xero Bank Account

This bank account is where payouts and any relevant payment gateway fees will be posted.
- Select Xero Clearing Account
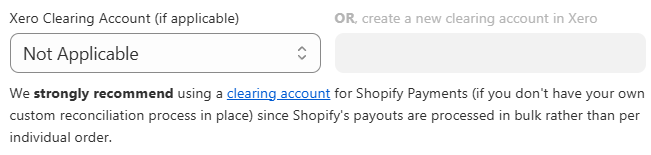
If payouts are deposited as a lump sum over a period of time (for example, daily, weekly, or monthly) rather than per individual order, we strongly recommend configuring a clearing account.
- Examples where a clearing account is recommended:
- Using Shopify Payments, where payouts are received as a lump sum based on the payout period (even if paid daily, multiple orders may be included).
- Using EFTPOS where payouts are received as a lump sum.
- Examples where a clearing account may not be required:
- Using PayPal where your PayPal account is connected to Xero as a bank feed, which provides individual order payouts.
- Using EFTPOS where individual payouts are received.
Your clearing account must be set up as a Bank account in Xero (even if it isn't connected to a real bank feed), as the app uses a bank transfer to move each payout from the clearing account to your bank account. Learn more.
Also make sure "Enable Payments to this account" is checked for the account in the Xero Chart of Accounts. If you haven't created the account yet, you can create one directly from this screen.
You can read more about what is a clearing accounts here.
- Select Payment Gateway Supplier Name
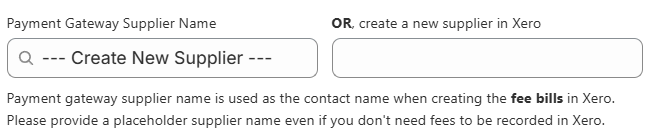
The payment gateway supplier name is used by the app as the contact name when creating fee bills in Xero.
We recommend selecting or creating a supplier name that closely matches the payment gateway you are configuring.
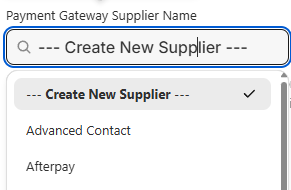
You can type in this field to search for an existing supplier or create a new one.
- Fix for possible issue:
- If you cannot find the contact name in the list, open the contact in Xero and trigger an update by adding and then removing a character.
- This is a Xero limitation where only recently updated contacts are shown.
- Enter Payment Gateway Fees

Enter the payment gateway fee for orders that use this payment method.
If the payment method charges fees per order, enter the percentage and/or flat rate charged. You will need to confirm the exact fee rates charged by your payment provider.
- Enter POS Gateway Fee

Check whether Shopify automatically calculates your POS gateway fee by reviewing the Shopify pricing page for your plan.
- Select Xero Fee Account and Tax Rate

Select the Xero expense account where payment gateway fees will be posted, along with the default tax rate to apply to those fees.
- Configure Payment and Fee Posting (Optional)

Choose whether payments and/or fees should be automatically generated for orders processed through this payment gateway. You do not need to configure this unless you plan to manually create payments and fee bills in Xero.
These settings are intended for users who have already configured their payment gateway but have changed their workflow and now wish to manage payments and/or fees manually. You can disable automatic posting by unchecking the relevant options.
- Configure Invoicing for Summarise Invoice (Optional)

Choose how orders from this gateway appear as invoices in Xero. This setting is optional — if left as default (Per order), the app will create one Xero invoice per Shopify order, which works for most stores.
- Per order — One Xero invoice per Shopify order. Keeps line-item detail and gives the cleanest audit trail.
- Daily summary — One consolidated invoice per day, grouped by this gateway. Reduces invoice volume in Xero if you have high order counts.
- By payout — One invoice per Shopify Payments payout, matching the bank deposit exactly. Only available for Shopify Payments.

If you select Daily summary or By payout, choose the Xero contact that all summary invoices for this gateway will be invoiced to. You can type to search for an existing contact or create a new one.

These sub-options become available when Daily summary or By payout is selected, and let you further customise the summarised invoice:
- Create refunds as credit notes — posted separately so refunds can be reconciled against the bundled summary invoice in Xero.
- Post fees as a separate fee bill — instead of itemising fees on the sales invoice, creates a single summarised bill.
- Save your payment gateway

Once you have finished configuring the payment gateway, click Add.

You can then click Save at the bottom right of the screen or use the save bar at the top of the page to save your changes.
Payment Gateway Configuration Fields
| Payment Gateway Name |
Select the payment gateway you'd like to configure. If a payment gateway is not listed, please reach out to us via Live Chat or email (help@hyvelabs.co) with the payment gateway name you'd like to add. |
|---|---|
| Payment Gateway Supplier Name |
The name of the payment gateway supplier (eg. for Shopify Payments, it might be Shopify International Limited). If the supplier does not already exist in Xero, you can create a new supplier in Xero from the screen. |
| Xero Bank Account | The bank account where payouts, and the relevant fees from the payment gateway goes to. |
| Xero Clearing Account |
If a payout is banked for a period of time (ie. a day, a week, a month etc.), you'll need a clearing account configured. If you've created one in Xero, ensure that the "Enable Payments to this account" is checked in the Xero Chart of Accounts. If it isn't already created in Xero, you can create one within the screen. You can read more about clearing accounts here. |
| Payment Gateway Fee |
If the payment gateway charges you a fee, enter that fee here. This could be a percentage (%) and/or a dollar ($) figure. For Shopify Payments, this is not required as it is pre-determined and set by Shopify based on your store's Shopify plan. For Paypal, for certain countries, this is being provided by Shopify and if provided, the app will use what is provided. However, it's still a good idea to have the fee details should this not be provided by Shopify. |
| Xero Fee Account | The expenses account in Xero where payment gateway fees gets posted / booked to. |
| Xero Fee Tax Rate |
The fee tax rate that the payment gateway fee gets defaulted to. If you're unsure, you can look up docs from the payment gateway or speak to your accountant / bookkeeper. |
| Enable Payment | Control whether the payment gateway posts payments for orders processed through this gateway. If disabled, invoices will remain unpaid and will not be automatically updated to Paid when the order is paid in Shopify. |
| Enable Fees | Control whether the payment gateway posts bills for the fees associated with this payment gateway. |