Tracking COGS and Inventory
This guide provides step-by-step instructions for tracking Cost of Goods Sold (COGS) and Inventory by ensuring products are set up correctly in both Xero and Shopify and enabling SKU matching.
Step 1 - Set up Product SKU in Shopify
- Log in to your Shopify Admin Panel.
- Go to Products from the left-hand menu.

- Click on the product you want to track.

- Scroll down to the Inventory section.
- Ensure that the SKU (Stock Keeping Unit) field is filled with a unique identifier of your choosing.

- Make sure that the Track quantity box is checked.

- Click Save to confirm the changes.
Step 2 - Set up Product SKU in Xero
- Log in to your Xero Account.
- Navigate to Business from the top menu.
- Select Products and services.

- Click on the New Item button to add a new product.
- In the Code field, enter the same SKU used in Shopify.

- Make sure that the Track inventory item box is checked.

- Set the Inventory Asset account to the account of your choosing.
- Modify the Purchase and Sell section according to your preferences, ensuring that the relevant accounts and tax rates are set up correctly.

- Click Save to confirm the changes.
Step 3 - Enable Match Product SKUs in the Post to Xero App
- Open the Post to Xero app.
- Navigate to the Setup - Xero section.
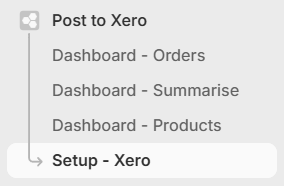
- Locate the Match Product SKUs setting.
- Enable this setting to ensure that product transactions in Shopify automatically match with the corresponding SKUs in Xero.

Once that's been enabled, any orders for that particular item will automatically be matched and posted to Xero according to the Sales, COGS, Inventory accounts, and Tax rate that have been set up in Xero for that item.
If you have a more complex setup for COGS and Inventory, feel free to reach out to us at help@hyvelabs.co to discuss your needs.
Troubleshooting — COGS Not Appearing After Setup
If you've completed the steps above but COGS is still not posting to your P&L, the most common cause is a zero cost pool on the Xero item.
Why this happens
Xero calculates COGS automatically when a sale is posted using a tracked inventory item. To do this, it uses the item's internal cost pool — the total capitalised cost of stock on hand. If your stock was previously managed in another system (e.g. Cin7, DEAR, or similar) and only quantity was migrated into Xero without cost value, the cost pool will be $0 and Xero will post $0 COGS on every sale.
Note: If you previously used another Shopify-to-Xero integration that posted COGS via manual journal entries, those journals bypassed Xero's inventory engine. Post to Xero uses Xero's native tracked-inventory logic, which requires the cost pool to be correctly populated.
How to check
In Xero, go to Business → Products and Services, open the affected item, and check whether a cost value is recorded against it. If Quantity on Hand is non-zero but no cost value is shown, the cost pool is likely $0.
How to fix
Your accountant or bookkeeper will need to populate the cost pool for the affected items. The two common approaches are:
- Inventory Adjustment (preferred) — Adjust the item in Xero to the correct quantity and total cost value. This directly sets both quantity and cost without creating additional purchase transactions. Formula: QOH × Unit Cost = TotalCostPool (e.g. 288 units × $10.00 = $2,880).
- Opening Balance Bill + Credit Note (if adjustments unavailable) — Post a bill for the full on-hand quantity at the correct unit cost, then immediately post a credit note for the same quantity. Xero retains the cost pool value while the quantity returns to its original level.
Once the cost pool is non-zero, Post to Xero will generate COGS automatically on all future sales.
If you need help diagnosing this, reach out to us at help@hyvelabs.co.